(Note: you can click on the images to enlarge for better view)
The Problem/Context:
In the name of “design,” sometimes we choose form over function. Â This is my first semester using Canvas for a Penn State World Campus course. Â This also happens to be my last class, so I was both happy and annoyed at having to use a different LMS (Learning Management System).
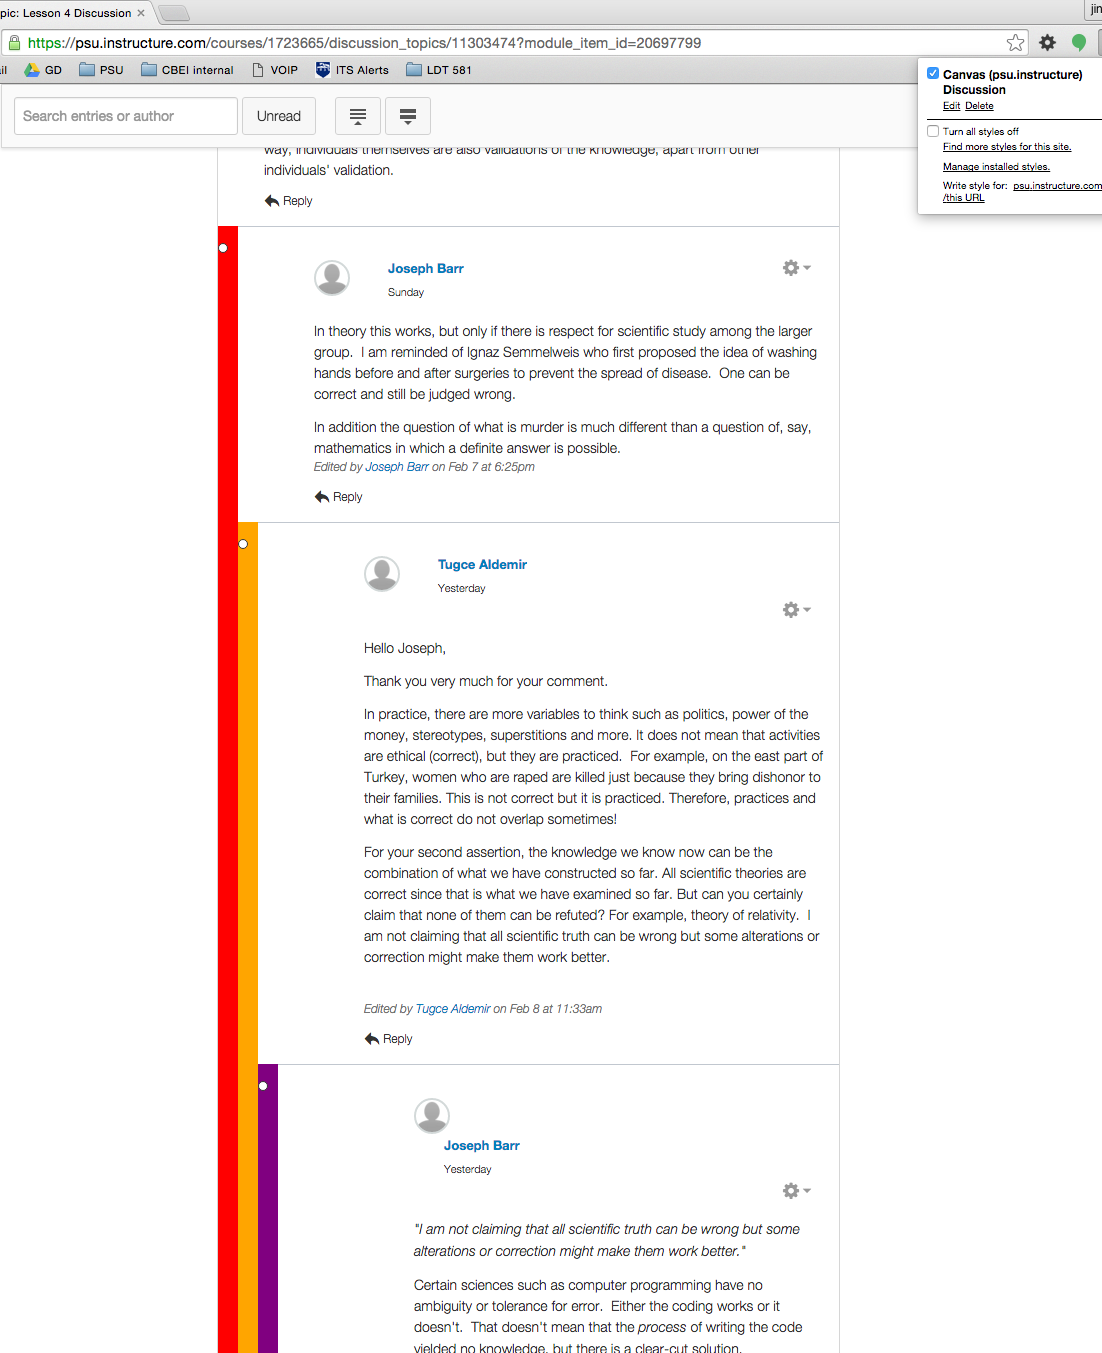
After a couple of weeks of very lively discussion in a graduate level course, it was obvious that the Canvas discussion function did not easily separate multiple levels of discussion. Â The left indentation wasn’t enough to easily follow replies of replies of replies.

You can see in the screenshot above, how the LMS is using left indentations as a visual guide to the hierarchy of the discussion. Â It’s honestly not that bad for smaller discussions, but once you have numerous replies, it became hard to follow the conversations.
So what can we do about it? Â My first reaction was trying to figure out how to inject CSS or jQuery code. Â That could get complicated and messy pretty quickly (and it’s definitely more geared towards a tinkerer/”hacker” rather than a typical student or faculty). Â CSS would be a more natural fit, since it’s really a visual problem (not an interaction problem). Â However, in doing some quick research, I found that CSS does not have a mechanism to select ancestors/parents. Â I learned something new today!
The solution?
Using a Chrome extension to inject very, very, very simple CSS to add a bigger left-padding and color-code for the corresponding “level” of each reply.
Stylish is a pretty straightforward CSS injector that saves custom CSS styles for different web pages.  Link It’s a Chrome extension, so it’s relatively easy for a non-technical person to use.
After adding the extension, you can add a custom style to the Canvas discussion page.

Click on the Stylish icon (“S” right of the address bar on Chrome) and choose the last option “Add Style for psu.instructure.com.”  My screen capture already lists the style, because I had already created it.  In that case, you can click  “Edit” and add/change some simple styles:
.replies {
    padding-left: 20px;
    background: yellow;
}
.replies .replies{
    background: red;
}

.replies .replies .replies {
    background: orange;
}

.replies .replies .replies .replies {
    background: purple;
}

Note that on the bottom, there’s a “Applies to…” Â field. Â I chose instructure.com for now, but may try to be more specific in the future if I don’t want it to apply to basically all pages in the instructure.com domain. Â Either way, it’s easy to turn off the custom CSS.
Also, make sure you give it a name that is descriptive – in my case “Canvas (psu.instructure) Discussion.”
Now, you can check/uncheck the custom CSS to show the new visual guides to the replies.