Long story short, I have wandered far into the rabbit hole of custom and mechanical keyboards, and, while I really enjoy some of the compact keyboard layouts, I did find myself missing some of the extra keys in a full keyboard.
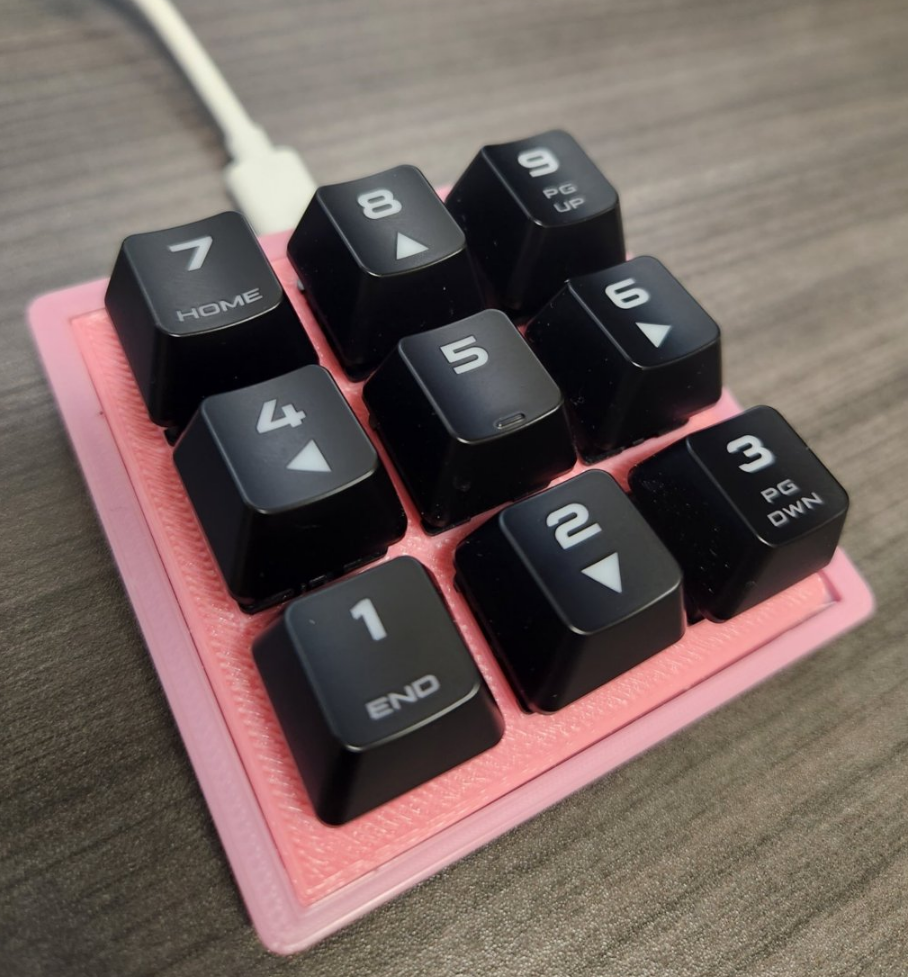
Armed with a 3D printer and an old mechanical keyboard that I could cannibalize for parts, I set out to build a custom, small macropad, with the goal of simply creating a small USB or bluetooth keyboard that could give me the four arrow keys.
Basically – something like this:

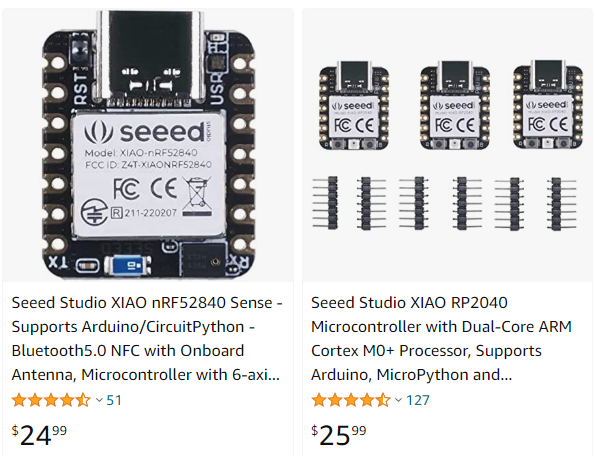
Instead of doing the sensible thing and just spending the $20, I somehow talked myself into buying these instead, because, I could customize it any way that I want… and supposedly save some money.
There wasn’t as much information in the internet on how to make the XIAO into a keyboard, because the more popular platforms are the more common (and larger) Arduino variants.
There were a couple of good resources, but none had all the details from A to Z.
So here’s the full A-Z overview:
- Download/Set up Arduino IDE
- Wiring the mechanical (Cherry MX Style) switches
- The code
Download/Set up Arduino IDE
This is not meant to be a comprehensive guide, but just compiling some of the “gotchas” I encountered while working on this project.
The Boards Manager does not have the Seeeduino Xiao by default, so you have to specify the “Additional boards manager URL’s” in the preferences.
The URL is: https://files.seeedstudio.com/arduino/package_seeeduino_boards_index.json
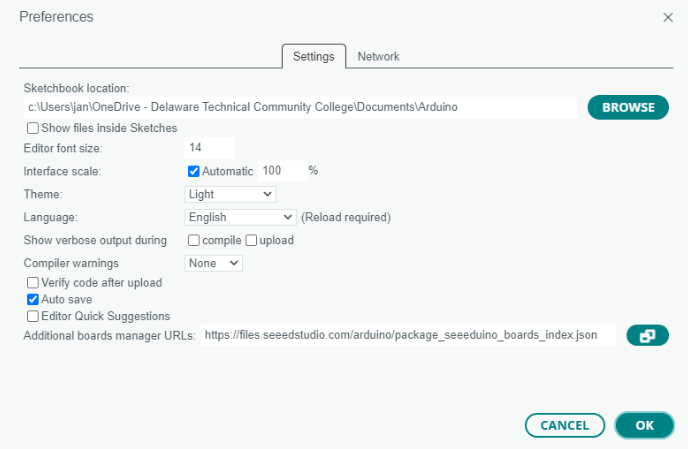
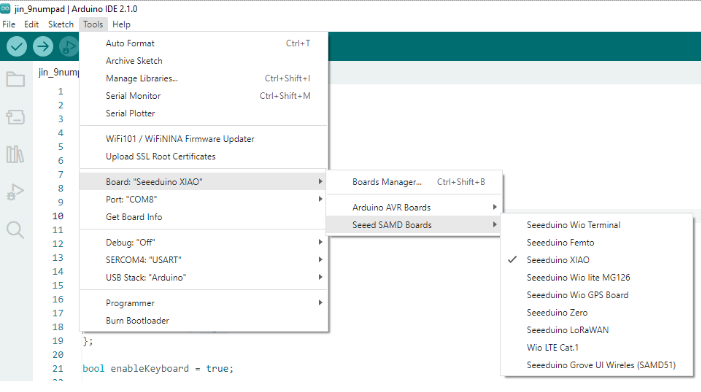
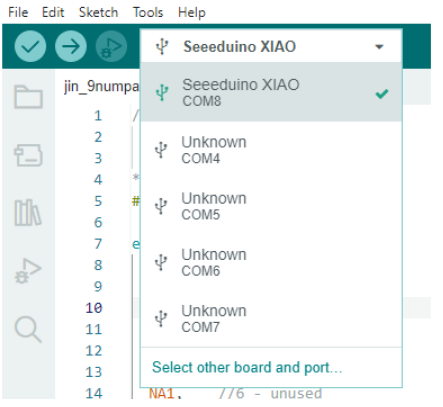
You’ll then go through the normal process of selecting the board/port.
Wiring the mechanical (Cherry MX Style) switches
Unlike some other controllers, NO RESISTORS NEEDED (using Xiao’s built in pullup input mode).
I ended up using some Cherry MX style mechanical keyboard switches, but any 2 pin momentary buttons should work.
You will wire:
- One pin from each button wired to ground (to each other and to the XIAO’s ground)
- One pin from each button wired to a different input on the XIAO
If you need more than the number of inputs in the XIAO, you can wire as a matrix instead. More info: https://www.dairequinlan.com/2020/12/the-keyboard-part-2-the-matrix/
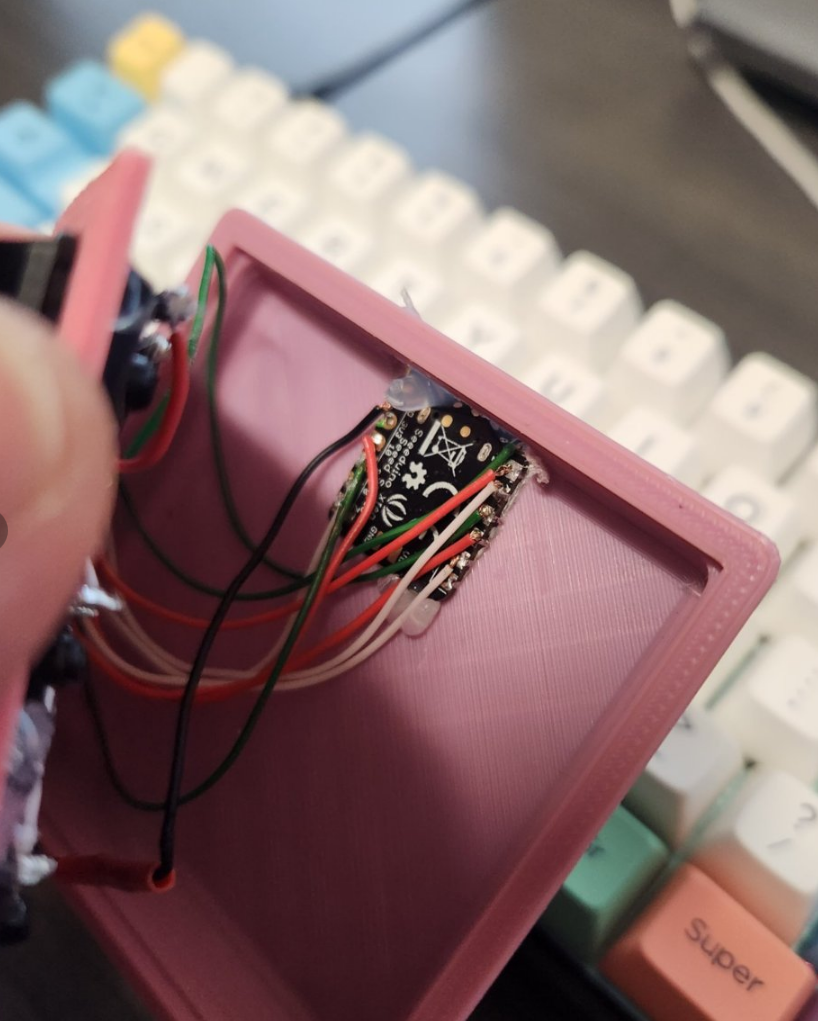
Photos below are a prototype and, I used a hot glue gun to keep it all together The prototype was built using: https://www.thingiverse.com/thing:4602619. I ended up hacking the print quite a bit, so, your mileage may vary.

The code
https://github.com/jinsungpsu/xiao-macropad/blob/main/xiao_macropad.ino
I tried to make the code as self-explanatory as I could. I went through quite a few iterations, and I am pretty happy with the current one, so it is public – in hopes that it will help people and save you some time. If you do end up using/modifying this code at all, please include attribution.
One of the things that is kind of different about this macropad is that it is disabled by default. When testing, I quickly realized that having a keyboard input prototype can really lock up your OS and have some inadvertent headaches (such as messaging a random person 150 “you pressed a button” – don’t ask me how I know).
In the configuration section of the code, there’s a two button combination that will enable the keyboard, and a different two different configuration that will disable the keyboard. Basically an on/off switch. In my case, you enable the keyboard by pressing ONE and THREE, and disable by pressing SEVEN and NINE.
There’s also a delay you can change, so you don’t send double/triple key presses.
/*
jinsungpsu.com

Summary
This is code for the Seeduino XIAO microcontroller, using Arduino/Keyboard.h library

Wiring details
  NO RESISTORS NEEDED (using Xiao's built in pullup input mode)

  Using 2 pin momentary buttons - tested using cherry MX mechanical keyboard switches
  One pin from each button wired to ground

  One pin from each button wired to a different input

  If you need more than the number of inputs in the Xiao, you can wire as a matrix instead
  https://www.dairequinlan.com/2020/12/the-keyboard-part-2-the-matrix/


Other information:
  LED_BUILTIN (low means one, high means off)
  When checking for logic throughout code, LOW means that input is detected

  Prototype built using: https://www.thingiverse.com/thing:4602619

*/

#include "Keyboard.h"

// Struct to encapsulate key mapping information
struct KeyMap {
  int keyCode = 0;
  String name = "Unused";
};

// enum to map to the keycaps used for reference/easy to read code from here on out
// These map to 0 through 10, corresponding to pins A0 to A11
enum keys{
  ONE,    //0 - bottom left     (A0)
  TWO,    //1 - bottom mid      (A1)
  THREE,  //2 - bottom right    (A2)
  FOUR,   //3 - mid left        (A3)
  FIVE,   //4 - mid mid         (A4)
  SIX,    //5 - mid right       (A5)
  NA1,    //6 - unused          (A6)
  NA2,    //7 - unused          (A7)
  SEVEN,  //8 - top left        (A8)
  EIGHT,  //9 - top mid         (A9)
  NINE    //10 - top right      (A10)
};

// global variables

// Configurable options
const int DELAY_BETWEEN_KEYPRESS = 75;

// simultaneously pressing down these TWO button combinations turns keyboard on/off
const int ENABLE_BTN1 = ONE;
const int ENABLE_BTN2 = THREE;
const int DISABLE_BTN1 = SEVEN;
const int DISABLE_BTN2 = NINE;

// constants/globals used - do not touch
const int NUM_INPUTS = 11;
bool enableKeyboard = false;       // keyboaord is off by default
struct KeyMap mappings[NUM_INPUTS];

void initializeMappings() {
  /*
  mapping info

  For "special" keys, check https://github.com/arduino-libraries/Keyboard/blob/master/src/Keyboard.h
  For example:
  mappings[FOUR].keyCode = KEY_LEFT_ARROW;
  mappings[FOUR].name = "Left Arrow";

  For "regular" keys, use a character in single quotes - for example:
  mappings[ONE].keyCode = 'a';
  mappings[ONE].name = "A key";
  */
  mappings[FOUR].keyCode = KEY_LEFT_ARROW;
  mappings[FOUR].name = "Left Arrow";

  mappings[FIVE].keyCode = KEY_DOWN_ARROW;
  mappings[FIVE].name = "Down Arrow";

  mappings[SIX].keyCode = KEY_RIGHT_ARROW;
  mappings[SIX].name = "Right Arrow";

  mappings[EIGHT].keyCode = KEY_UP_ARROW;
  mappings[EIGHT].name = "Up Arrow";
}

void checkKeyboardStatus() {
  if (digitalRead(ENABLE_BTN1) == LOW && digitalRead(ENABLE_BTN2) == LOW) {
    enableKeyboard = true;
    digitalWrite(LED_BUILTIN, LOW);
  } else if (digitalRead(DISABLE_BTN1) == LOW && digitalRead(DISABLE_BTN2) == LOW) {
    enableKeyboard = false;
    digitalWrite(LED_BUILTIN, HIGH);
  }
}

void sendKeyPress() {
  for (int i = 0; i < NUM_INPUTS; i++) {
    if (digitalRead(i) == LOW) {
      Serial.println(mappings[i].name);
      Keyboard.write(mappings[i].keyCode);
    }
  }
}

void setup() {

  initializeMappings();

  // initialize built in LED to output mode
  pinMode(LED_BUILTIN, OUTPUT);

  for (int i = 0; i < 11; i++) {
    pinMode(i, INPUT_PULLUP);     // Initialize all inputs into pullup input mode
  }

  Keyboard.begin();
  Serial.begin(9600);
}

void loop() {
  checkKeyboardStatus();

  if (enableKeyboard) {
    sendKeyPress();
  }

  delay(DELAY_BETWEEN_KEYPRESS);
}